Total: $0.00
Taxes and shipping calculated at checkout


Alright, folks! Let's dive into the wonderful world of shea butter and learn how to jazz up your plain ol' lotion base. Adding shea butter to your lotion is like giving your skin a VIP pass to hydration heaven. It's not rocket science, but there are a few tricks of the trade to ensure you get it just right.
First things first, why bother adding shea butter to your lotion base? Well, this miracle ingredient is chock-full of vitamins and fatty acids that'll make your skin sing. It's like a tall drink of water for parched skin, and who doesn't want that? Plus, it's got anti-inflammatory properties that can soothe irritated skin faster than you can say "goodbye, dryness!"
Before we get our hands dirty (or should I say, silky smooth?), let's talk about the basics. You'll need a lotion base, some high-quality shea butter, and a dash of patience. Don't worry if you're not a DIY guru – by the end of this article, you'll be whipping up shea butter-infused lotions like a pro!
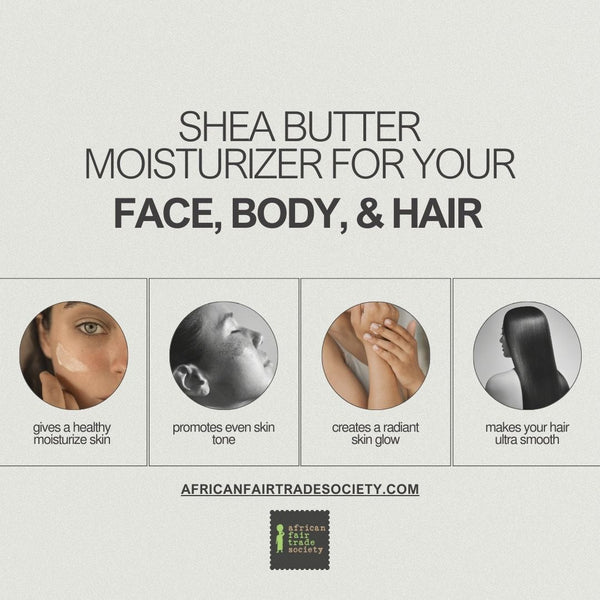
Hold onto your hats, because the benefits of adding shea butter to your lotion are about to blow you away! This isn't just some trendy ingredient – shea butter has been a skincare superhero for centuries, and for good reason.
First off, let's talk moisture. Shea butter is like a tall glass of water for your skin, but better. It's packed with fatty acids that create a protective barrier, locking in hydration and keeping your skin soft as a baby's bottom. But wait, there's more!
Here's a quick rundown of the amazing benefits:
But don't just take my word for it. According to a study published in the Journal of Oleo Science, shea butter has "anti-inflammatory and anti-tumor promoting compounds" that can work wonders for your skin1.
Now, I know what you're thinking – "This sounds too good to be true!" But trust me, once you start using shea butter-infused lotion, you'll wonder how you ever lived without it. Your skin will be softer than a cloud and more radiant than a summer sunrise. Who needs a time machine when you've got shea butter, right?
Alright, let's get down to brass tacks. Not all shea butter is created equal, and choosing the right one can make or break your lotion. It's like picking the perfect avocado – you want it just right!
When you're on the hunt for shea butter, keep these factors in mind:
Here's a handy table to help you compare different types of shea butter:
| Type | Color | Texture | Scent | Best for |
|---|---|---|---|---|
| Raw, Unrefined | Ivory to yellow | Creamy | Nutty | Maximum benefits |
| Refined | White | Smooth | Odorless | Sensitive noses |
| Whipped | Light, fluffy | Airy | Varies | Easy mixing |
Now, I know what you're thinking – "Where can I get my hands on some top-notch shea butter?" Well, you're in luck! The African Fair Trade Society offers premium, ethically sourced shea butter that'll make your lotion sing. It's like the Rolls Royce of shea butter, and your skin deserves nothing less!
Alright, DIY enthusiasts, it's time to roll up our sleeves and get mixing! Don't worry if you've never done this before – I'll walk you through it step by step, and before you know it, you'll be a shea butter lotion maestro.
Here's your foolproof guide to adding shea butter to your lotion base:
And voila! You've just created your very own shea butter-infused lotion. Pat yourself on the back – your skin is about to thank you big time!
Listen up, lotion lovers! Now that you've got the basics down, let's take your shea butter game to the next level. These tips and tricks will help you create a lotion so luxurious, you'll feel like royalty every time you slather it on.
Remember, perfecting your shea butter lotion is a journey, not a destination. Don't be afraid to experiment and find what works best for you. After all, your skin is unique, and it deserves a custom-made treat!
Alright, let's have a heart-to-heart. We've all been there – excited to try something new, only to end up with a Pinterest fail. But fear not! I'm here to help you sidestep those pesky pitfalls and create a shea butter lotion that's nothing short of fabulous.
Here are some common mistakes to watch out for:
Remember, even the most experienced DIY-ers make mistakes sometimes. The key is to learn from them and keep improving. Before you know it, you'll be whipping up shea butter lotions like a pro!
Alright, creative cats, it's time to put your personal stamp on your shea butter lotion! Adding essential oils isn't just about making your lotion smell divine (although that's a pretty sweet bonus). It's about creating a custom blend that caters to your specific skin needs and mood. Let's dive into the wonderful world of essential oil customization!
First things first, here are some popular essential oils and their benefits:
Now, let's talk about how to add these magical drops to your lotion:
Remember, the joy of DIY is in the experimentation. Have fun with it, and don't be afraid to create your own signature scent!
In conclusion, adding shea butter to your lotion base is a game-changer for your skincare routine. It's like giving your skin a big, moisturizing hug every day. With its incredible benefits and versatility, shea butter is truly nature's gift to our skin.
Now that you're armed with all this knowledge, why not take the plunge and try it yourself? And here's a pro tip: start with the best ingredients possible. The African Fair Trade Society offers 100% pure, ethically sourced shea butter that'll take your homemade lotion to the next level.
So, what are you waiting for? Your skin deserves the royal treatment. Head over to the African Fair Trade Society website and grab some premium shea butter today. Trust me, your skin will thank you!